• Default

    Installation Guide: Infiltrator Quick4 Plus Equalizer 36 Low Profile Chamber

    The Infiltrator Quick4 Plus Equalizer 36 Low Profile Chamber is an innovative solution for efficient water management in residential properties. This guide provides a detailed, step-by-step approach to installing this system, ensuring a successful and efficient setup.
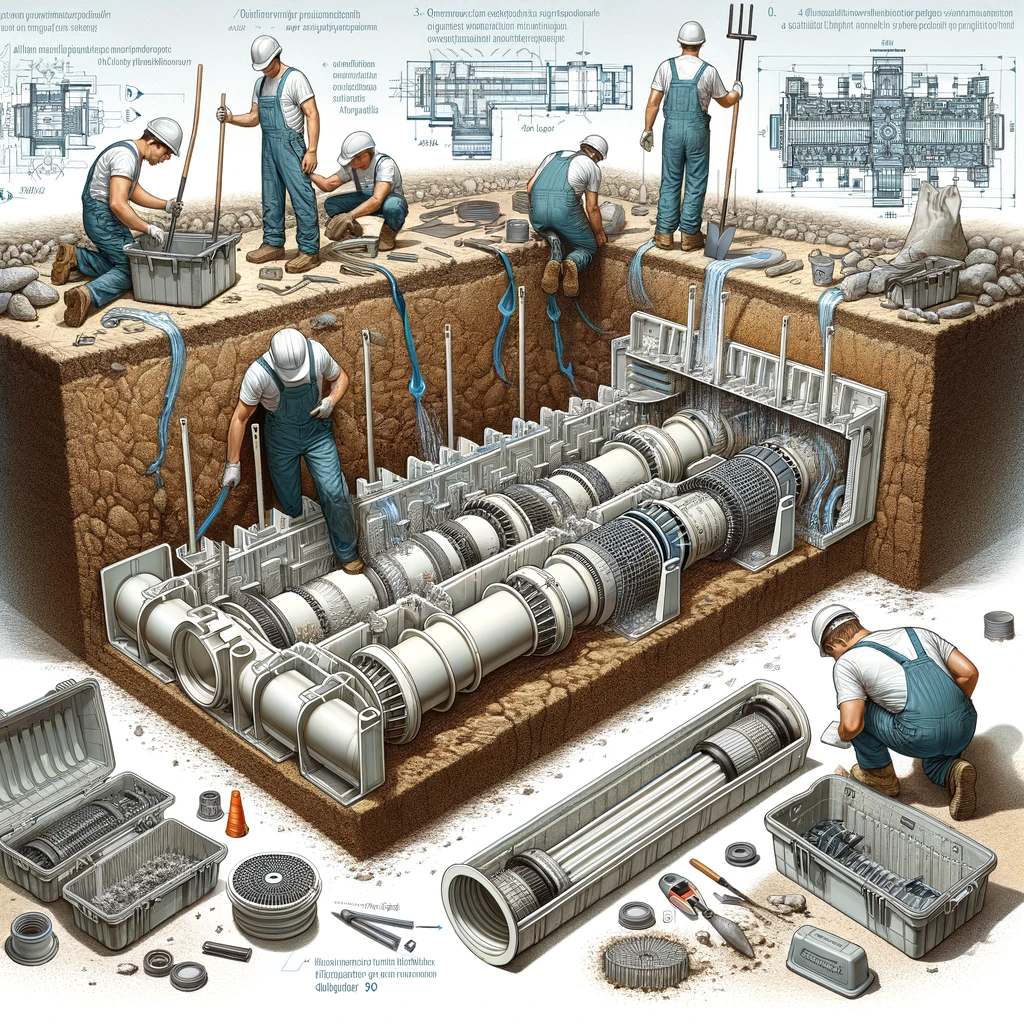
    Step-by-step installation of Infiltrator Quick4 Plus Equalizer 36 Low Profile Chamber, showcasing workers and tools in an underground site.
    Efficient Installation in Action: Infiltrator Quick4 Plus Equalizer 36 Low Profile Chamber.

    Understanding the Infiltrator Quick4 Plus Equalizer 36

    Before diving into the installation process, it’s crucial to understand the components and functionality of the Infiltrator Quick4 Plus Equalizer 36. This system is designed for durability and efficiency, offering an effective way to manage water in various home renovation and landscaping projects.

    Key Features

    • Low Profile Design: Ideal for shallow installations, reducing the need for extensive excavation.
    • High Strength: The chamber is designed to withstand heavy loads, making it suitable for different ground conditions.
    • Easy to Handle: Its lightweight and simple interlocking design facilitate easy transportation and installation.

    Pre-Installation Preparations

    Tools and Materials Required

    • Shovel or excavator
    • Level
    • Tape measure
    • Gravel
    • Perforated pipe
    • Safety gear

    Site Assessment and Planning

    • Area Measurement: Measure the installation area to ensure adequate space for the chamber system.
    • Soil Evaluation: Assess the soil type and drainage capacity to determine the depth and layout of the system.
    • Permits and Regulations: Check local building codes and obtain necessary permits before beginning installation.

    Installation Steps

    Step 1: Excavation

    • Dig a trench according to the dimensions required for the chamber system, ensuring it is level and free from debris.

    Step 2: Laying the Base

    • Spread a layer of gravel at the bottom of the trench. This layer should be level and compacted to provide a stable base.

    Step 3: Assembling the Chamber

    • Assemble the Infiltrator Quick4 Plus Equalizer 36 chambers by snapping them together end-to-end. Ensure they are securely connected.

    Step 4: Positioning the Chamber

    • Place the assembled chamber in the trench. Check for level alignment and adjust as necessary.

    Step 5: Connecting to the Perforated Pipe

    • Connect the chamber system to the perforated pipe, ensuring a secure and leak-proof connection.

    Step 6: Covering with Gravel

    • Cover the chamber with another layer of gravel, ensuring it extends a few inches above the top of the chamber.

    Step 7: Backfilling

    • Backfill the trench with soil, compacting it to prevent settling. Ensure the topsoil layer is level with the surrounding ground.

    Post-Installation Checklist

    • Inspect the System: Ensure all parts are correctly assembled and the system is functioning as expected.
    • Cleanup: Remove any excess materials and tidy up the installation site.
    • Documentation: Keep a record of the installation process, including diagrams and measurements, for future reference.

    Maintenance Tips

    • Regularly check the system for blockages or damage.
    • Schedule periodic inspections by a professional to ensure long-term functionality.
    • Avoid planting deep-rooted plants near the chamber system to prevent root intrusion.

    Troubleshooting Common Issues

    • Water Pooling: If water pools above the system, check for blockages or improper installation.
    • Chamber Misalignment: Realign the chambers if they become dislodged or misaligned after installation.

    Conclusion

    Installing the Infiltrator Quick4 Plus Equalizer 36 Low Profile Chamber can be a straightforward DIY project with the right preparation and attention to detail. By following this guide, homeowners can ensure a successful installation, contributing to efficient water management and the longevity of their property’s water system.

  • Default

    Mastering Roof Repair in San Diego: Tips for a Durable and Stylish Rooftop

    “Mastering ‘Roof Repair San Diego‘ is key for homeowners aiming to blend durability with style. This article provides valuable insights and tips to help you maintain a roof that’s not only sturdy but also complements your home’s aesthetic.”

    Informative image showcasing various durable and stylish roofing options for San Diego homes, including eco-friendly and modern designs
    Elevate Your Home with Durable and Stylish Roofing Solutions in San Diego.

    Understanding San Diego’s Roofing Needs

    San Diego’s climate, with its sunny skies and occasional heavy rains, demands a specific approach to roofing. It’s not just about repairs; it’s about choosing materials and styles that withstand the weather while enhancing your home’s appearance.

    Selecting the Right Roofing Material

    • Asphalt Shingles: A popular choice for their balance of cost, durability, and style.
    • Clay Tiles: Ideal for adding a classic, timeless look to your home, excellent for hot climates.
    • Metal Roofing: Offers longevity and energy efficiency, with a modern appeal.

    Innovative Roofing Trends

    Stay ahead of the curve with the latest trends in roofing. Eco-friendly options, such as cool roofs and green roofs, are gaining popularity in San Diego for their energy efficiency and environmental benefits.

    Tips for Effective Roof Repair

    1. Regular Inspection: Conduct bi-annual inspections to spot and address issues early.
    2. Quality Repairs: Use high-quality materials and trusted techniques for repairs to ensure longevity.
    3. Aesthetic Integration: Choose repair solutions that align with your home’s architectural style.

    Dealing with Common Roofing Issues

    • Leaks: Address leaks immediately to prevent water damage and mold growth.
    • Wear and Tear from Sun Exposure: Use materials that are resistant to UV radiation to prolong roof life.
    • Storm Damage: After a storm, inspect and repair any damages to prevent further deterioration.

    Balancing Function and Style

    Your roof should protect your home and look good doing it. Consider both functional and aesthetic aspects when planning repairs or upgrades.

    The Importance of Professional Roof Repair Services

    For complex repairs, always rely on professional roofing contractors. They bring expertise, proper equipment, and a warranty on their work.

    Eco-Friendly Roofing Options

    Consider sustainable options like solar tiles or reflective coatings to reduce your carbon footprint and potentially save on energy costs.

    Maintenance for Longevity

    Regular maintenance, such as cleaning gutters and removing debris, is vital for extending the life of your roof and maintaining its appearance.

    Conclusion

    Effective roof repair in San Diego involves a mix of practicality, style, and sustainability. By understanding the local climate, choosing the right materials, and utilizing professional services when necessary, you can ensure a durable, stylish, and functional roof for your home.

-